
The SCAPE project is into its final 6 months and with that came our final developer workshop. The main focus of this event was demonstrations, productisation and sustainability, however with everyone together it provided an opportune time to make progress with other SCAPE related activities. With nearly 30 people there, there was a lot going on and so the agenda needed to be flexible to enable productive working, but managed to ensure the workshop’s overall goals were achieved. This post discusses our use and experience of kanban as a means to manage such workshops.
Kanban is a visual way of managing tasks through a workflow. It is lightweight, applicable to whatever process you have today, and doesn’t require a lot of overhead. It is based on three principles (some say 6): visualise, limit Work in Process (WIP) and manage flow, which serve to ensure tasks and processes are brought into the open for discussion, that lead times are reduced and that the workflow is understood and continually improved through monitoring. For the purposes of this SCAPE workshop the main priority was visibility of the work.
Visualising Tasks
Typically a workflow is represented on a kanban board along with the work items that move through this workflow. Placing such a board on the wall enables everyone to see what’s being worked on, who’s working on it, and at what stage in the workflow it’s at. There is a minimal overhead – creating work item cards and moving them through the workflow stages – but this is manageable with short, regular update discussions.
Task Boards
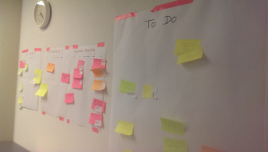
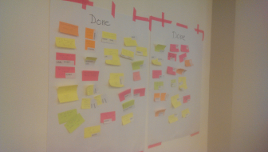
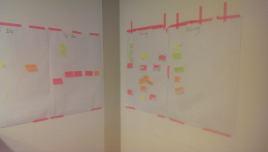 Using large sheets of paper stuck to the meeting room walls, we created a primary board with 3 main columns: To Do, Doing, Done. After introductory presentations recapping the purpose of the workshop and the main goals, participants were urged to consider tasks they needed to do and to write them on sticky notes, whilst further presentations were given about specific activities that needed doing (e.g., generating microsite documentation for each tool). This worked really well as it got participants thinking about and writing down what they needed to do whilst discussions were happening.
It is important to note that a fair amount of pre-work was performed in the lead-up to the workshop. For example, gaps in tool documentation and tool installation issues were both identified prior to the workshop. These were then introduced in the initial presentations (and discussed further during the remainder of the workshop) and provided a valuable initial set of tasks that quickly got the workshop moving. The motivation for this pre-work was driven primarily by the desired overall goals of the workshop.
Tasks
One sticky note equated to one task. We made no distinction between different coloured notes, although the colours could have been used to indicate categories of work, e.g., bugs, development, documentation, etc. This does add another level of complexity into visualising the work and given the workshop was only 3 days long, not giving meaning to the colours kept things simple.
Similarly, it is useful to know who is working on a task. We pre-printed everyone’s names onto white stickers which could be affixed to the sticky notes. Being white on coloured notes emphasised the names, making it easier to see which tasks were ownerless. Avatars were considered, however given the short duration of the workshop and the fact that few people pre-selected one, we didn't use them (they were film character based and so didn't relate to any specific individual at the workshop, meaning it probably would have been harder to work out who the task "owner" was anyway).
"Why does this tool have its own board?"
Beyond the main board we also had several smaller boards for individual software tools being worked on. These had the same 3 columns as before, but also including “Waiting for Feedback” (queue) and “Feedback” columns between ‘Doing’ and ‘Done’. These two additional columns were motivated by the work on documentation, where checks were thought necessary to ensure documentation completeness. I didn’t see these columns used much, and they could have equally been replaced by creating “Check documentation for tool X” sticky notes once the “Do documentation” task had been completed.
 We never had any logic or consistency in which tools had their own board and which didn’t, which resulted in some confusion; a few times I overheard questions such as “why does this tool have its own board?” to which there was no obvious answer. In many ways these smaller boards acted as swim lanes for those tools, the lanes just happened to be separated out into their own boards. Separate boards highlight the work on a specific tool/topic, but perhaps unnecessarily isolate that work from the rest. If a clear distinction between work item “topics” is needed, different coloured sticky notes could always be used instead (this wasn’t the case for us though), but caution should be used to avoid making it too complex (e.g. through use of too many colours).
Work in Process – What to look out for
The emphasis for taking a kanban approach was to bring the tasks being worked on out into the open. It can often be hard to manage workshops with 30 people all working on different things and ensure that the workshop’s goals are met. However, having tasks visible on the board with people’s names attached to them means no-one can hide.
No emphasis was placed on limiting the amount worked on by one person, although people naturally tended towards only working on one or two things at a time. Progress was simply monitored through ad-hoc group discussions centred on the boards and going around the table asking each participant how they were getting on. This sometimes resulted in the need to move a sticky note from one column to another, but forgetting to do this can be excused by unfamiliarity with the kanban approach. A number of times, people were working on things that didn’t have a sticky note at all; asking them to create one then and there was the easiest approach to ensuring it happened, and also encouraged a few others to slyly put up other missing notes!
Another thing to look out for are ill-written tasks – tasks descriptions that are either too vague to be understood (by anyone other than the task owner) or too high-level that they encompass many individual tasks. A big factor in using kanban is to bring the work out into the open so everyone can become familiar with what’s going on. If the actual things being worked on are hidden behind vague descriptions then nothing is communicated and you may as well not have had the note at all.
Lessons Learned
Kanban was a very effective approach to managing the wide variety of tasks going on at the workshop, and recommended for such meetings. The following bullets summarise the discussions above, reflecting our experiences with the technique, and are directed at the use of kanban in short workshops (i.e. the recommendations may be different if applied to a long-running project, for instance).
Preparation:
- Understand what the key goals are that need to be achieved at the workshop and prepare accordingly; from this it is likely that an initial set of tasks can be created (or at least hinted at) to help get the workshop up-to-speed quickly.
At the Workshop:
- Briefly explain the kanban process and give everyone sticky notes so they can write tasks as soon as they think of them; do this up front before main presentations.
- Keep any introductory presentations short and directed towards encouraging task identification around the main workshop goals; aim to swiftly move on to the "doing".
Visualise, but keep things simple:
- Keep everything on the same board; 3 columns (To Do, Doing, Done) is often enough.
- Don’t give meaning to sticky note colours unless there’s a good reason to; if there is a good reason, create a key to ensure everyone understands each colour’s meaning.
- Use stickers with people’s name on. These are more obvious than handwritten names, and easier to recognise who they refer to than avatars (given the short duration of the workshop). If using avatars, consider just using people’s photo (perhaps also with their name).
Tasks:
- Ask for note rewrites or breakdowns into multiple notes where task descriptions are vague or too high-level.
- Encourage ownership of tasks by getting the person whose task it is to write the note.
Manage the boards:
- Hold ad-hoc group discussions centred around the boards.
- Ask for status updates by person rather than task, so that missing on task notes can be identified (this favours having all the tasks identified over an exact status for each).
- Understand that people (especially those new to the process) forget to create/update tasks; encourage note creation as soon as the gap is recognised; if necessary, move tasks appropriately during the ad-hoc recaps.
- Don’t move tasks to “Done” until they truly are done; “I’ve just got to push the code back to the repository” means it’s not finished.
Job Done!
It was great to see everyone participate in the approach – I was expecting reluctance from people to get involved, but was surprised by the level of enthusiasm; I even noted someone exclaim at completing a task before jumping up to triumphantly move the sticky note to the done pile! With a variety of tasks, progress across the board can often be seen quickly (for us, things were complete by the end of the first day), and at the end of the workshop hopefully you end up with a “Done” column full of sticky notes and (if anything’s left) a “To Do” column with follow-up actions.


